

Attic Hatch Insulation: How to Seal, Insulate and Save Energy
Attic hatch insulation is one of the most effective and least costly upgrades a homeowner can make to reduce energy waste and improve comfort. The opening to your attic is often a major source of heat loss in winter and heat gain in summer. Properly insulating and sealing the attic hatch closes that gap and helps your heating and cooling systems run less. In this article we will cover why attic hatch insulation matters, what materials work best, how to install insulation correctly and maintenance tips that prolong benefits.
Why Attic Hatch Insulation Matters
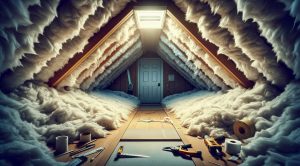
Many homes lose a significant portion of conditioned air through the attic opening. This can cause uneven temperatures in living spaces and force your furnace or air conditioner to run longer. Attic hatch insulation reduces drafts and thermal bridging at the access point. That translates into lower energy bills, fewer cold spots and reduced strain on HVAC systems. In addition to energy savings, effective insulation helps control moisture movement and can contribute to a healthier indoor environment.
Common Problems with Uninsulated Attic Hatches
Typical issues include visible gaps, loose or damaged seals and insufficient insulating material on the hatch door. Even a well insulated attic floor can be compromised by a thin or poorly sealed hatch. In many houses the hatch was never insulated at the factory or the original material has deteriorated over time. Air leaks around the frame, warped doors and missing gaskets all reduce performance. The good news is these problems are often straightforward to correct with basic materials and clear steps.
What Materials Work Best for Attic Hatch Insulation
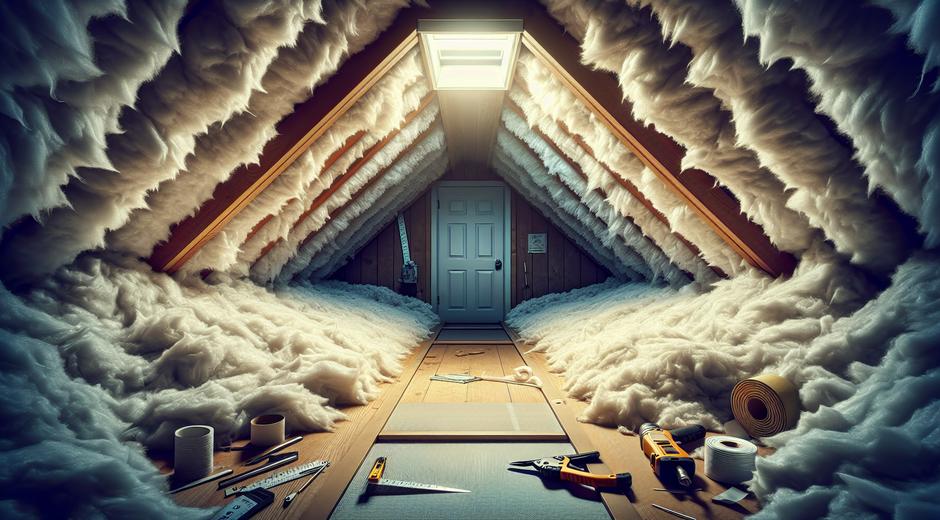
Choosing the right materials improves long term performance. Common options include rigid foam panels, insulated covers with a secure flap, and fiberglass or mineral wool batt placed carefully over the hatch. Rigid foam offers high insulating value for a thin profile. Insulated covers can be custom made and fit like a lid. Fiberglass and mineral wool are cost effective and easy to handle but need protection from compression and moisture. For older hatches, adding weatherstripping around the frame provides a crucial air seal and should be paired with insulation.
Step by Step Guide to Insulating an Attic Hatch
Follow these steps to get reliable results. Before starting make sure you have a dust mask, gloves and eye protection when handling loose or batt insulation.
1 Start by inspecting the hatch for gaps, broken fasteners or damage. Remove loose debris and clean the frame. 2 Apply a continuous strip of weatherstripping around the edge of the hatch frame to form an air tight seal. Choose a resilient gasket that compresses slightly when the hatch is closed. 3 Install rigid foam panels sized to fit securely on top of the hatch. If using foam cut the pieces so they sit flush and cover the full surface. 4 For a removable option build or buy an insulated cover that sits over the hatch inside the attic. Make sure it cannot fall or shift. 5 Add batt insulation around the cover or hatch area to blend with the attic floor. Avoid compressing batt material because compression reduces insulating value. 6 Seal any remaining small gaps with low expansion foam or caulk. Pay attention to corners where air tends to leak.
These steps improve the thermal barrier and reduce convective heat transfer. If you prefer a professional installation many contractors will perform the task quickly at a modest cost.
Air Sealing Tips That Matter
Insulation without sealing will not perform as expected. Focus on air sealing the frame and any rough openings around the hatch. Use high quality weatherstripping with a durable adhesive or mechanical fasteners. For larger gaps use expanding foam designed for attic openings. Avoid using materials that attract pests or degrade with temperature swings. Proper sealing also reduces dust migration from the attic into living areas and helps your insulation maintain its designed performance.
Choosing the Right R Value and Thickness
Recommended insulation levels vary by climate and local codes. Instead of a single number here focus on matching the insulation used in the rest of the attic. The attic hatch should not be weaker than surrounding areas. R value is a measure of resistance to heat flow. Higher R value provides better insulation but may require more thickness. If space is limited rigid foam with high insulating value per inch is often the best choice. For most climates aiming for performance similar to the attic floor is the practical approach.
DIY Versus Professional Installation
Many homeowners can successfully insulate an attic hatch with basic tools. The task usually takes a few hours and uses common materials. If the hatch is located over finished living space or there are electrical items near the opening consider hiring a professional to ensure safety and code compliance. A contractor can also advise on vapor management and long term moisture control in humid climates. Whether you tackle the job yourself or hire help the key goal is to create a continuous thermal and air barrier.
Common Mistakes to Avoid
Avoid compressing batt insulation over the hatch because compressed insulation loses effective value. Do not block attic vents when adding material around the hatch. Maintain ventilation paths so the attic can purge moisture and heat as intended. Another common error is using tape alone where a gasket or foam would perform better to seal edges. Finally avoid placing insulation directly against heat producing fixtures without proper clearance. When in doubt consult a professional.
Maintenance and Long Term Care
Inspect the attic hatch annually for signs of wear, movement or moisture intrusion. Replace weatherstripping that has flattened or lost adhesion. If insulation looks displaced gently reposition it and add fasteners or supports if needed. Keep combustible storage away from equipment and preserve clearances recommended by manufacturers. Well maintained attic hatch insulation can last many years and provide ongoing energy savings.
How Attic Hatch Insulation Fits in a Home Energy Plan
Attic hatch insulation should be part of a comprehensive energy plan that includes sealing other leaks, adding attic floor insulation and checking ducts for leaks. Small improvements such as insulating the hatch often pay back quickly in energy savings and comfort. For more home repair ideas and practical guides visit fixolix.com where you will find step oriented articles and product suggestions suited to common homeowner projects.
Further Reading and Professional Resources
If you want additional technical guidance or policy related resources check reputable sources and industry publications. For related perspectives and content consider a partner resource at Politicxy.com which often covers broader topics that intersect with home energy and public policy. Combining practical how to content with larger context helps homeowners make informed decisions for both immediate and long term upgrades.
Conclusion
Attic hatch insulation is a high value, low effort upgrade that improves comfort, reduces energy waste and protects equipment. Whether you choose rigid foam, an insulated cover or well installed batt material the keys remain proper sealing, avoiding compression and maintaining ventilation where required. Use the steps and tips in this article to plan and execute a reliable installation. The result is a tighter home, lower bills and a more comfortable living environment all year round.