

Ultimate Guide to Stud Spacing for Strong and Compliant Walls
Understanding stud spacing is a fundamental skill for anyone who works on building or repairing walls. Whether you are a homeowner planning a renovation or a professional tradesperson refining your craft, knowing the right stud spacing ensures that your walls are structurally sound reliable and code compliant. This guide explains what stud spacing means why it matters common spacing standards how to calculate the correct spacing and practical tips to avoid costly mistakes.
What Is Stud Spacing and Why It Matters
Stud spacing refers to the distance between the centers of adjacent wall studs. Studs are the vertical framing members that support loads provide a surface for attaching wall coverings and create cavities for insulation electrical and plumbing. Correct stud spacing helps distribute loads from roof and floor systems maintains the flatness of wall surfaces and allows for secure attachment of drywall sheathing and other finishes.
Incorrect stud spacing can lead to walls that bow or flex cause drywall to crack or screw heads to pop out and produce structural weaknesses that may fail under load. Using the right stud spacing also affects energy efficiency because it influences how insulation fits in the cavity and whether thermal bridging is minimized.
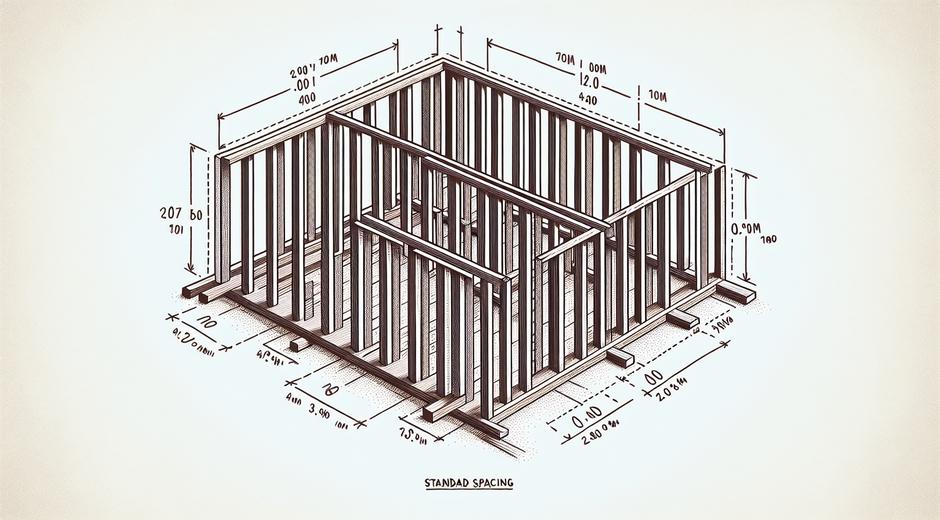
Common Stud Spacing Options
There are several common stud spacing patterns used in residential and light commercial construction. The selection depends on local building code requirements the type of wall covering and the structural loads the wall must carry. The two most common spacing intervals are 16 inches and 24 inches on center. When information is given as on center it means the measured distance from the center of one stud to the center of the next stud.
16 inches on center is very common for interior and exterior walls where drywall or plaster will be applied. This spacing offers good support for wall finishes and is preferred for load bearing walls because it provides a greater number of studs to carry vertical loads. 24 inches on center is often used where materials and design allow for wider spans and where the structural design has taken the increased spacing into account. Some specific applications such as non load bearing partitions or certain engineered wall systems can use 24 inches on center safely.
Other spacing choices exist for specialized projects. For example when heavier finishes such as tile or stone are planned closer stud spacing may be required to prevent deflection. In some older homes studs were placed at irregular centers and part of renovation work involves locating existing studs and adapting new finishes accordingly.
How Building Codes Influence Stud Spacing
Local building codes often dictate minimum stud spacing and requirements for specific wall types. These codes consider factors such as wind loads seismic conditions and snow loads which alter structural demands. It is essential to consult applicable codes or a structural professional when designing load bearing walls or making significant changes to an existing structure.
For example many codes set prescriptive rules for exterior walls and require studs at 16 inches on center for load bearing walls unless engineered calculations demonstrate that wider spacing is safe. Codes also provide guidance for fire blocking blocking around openings and requirements for corners where more support is needed for attaching cabinets and finishes.
How to Calculate Stud Spacing for Your Project
Calculating stud spacing begins with identifying the total wall length and determining how many studs are needed based on your chosen on center spacing. To estimate the number of studs divide the wall length by the chosen spacing and then add one for the end stud. For accurate planning you should also account for additional studs at door and window openings where king studs jack studs and cripple studs will be required.
A simple method works well for planning materials. For example for a 12 foot wall using 16 inches on center first convert feet to inches so twelve feet becomes 144 inches. Divide 144 by 16 to get nine spaces then add one stud to get ten studs needed plus extra framing around openings. This calculation helps you order the right amount of lumber and avoid delays on site.
When cutting lumber remember to align studs to accommodate insulation and electrical routing. Electrical boxes and plumbing should be considered in advance so that stud placement allows for safe installation of services without compromising the structural integrity of the wall.
Locating Existing Studs and Repairing Old Walls
In renovation projects locating existing studs is an early task. A stud finder is a simple tool that detects changes in density behind a wall surface and helps you find the center of studs. You can also find studs by tapping to listen for a solid sound or by measuring from an outlet box which is typically mounted to a stud. Measure in 16 inch increments but be prepared to adjust if the home was built with a non standard pattern.
When repairing walls damaged by moisture or impact you must replace compromised studs and ensure that the new stud spacing matches surrounding sections. Proper attachment of new studs to top and bottom plates and correct nailing or screw patterns are critical for restoring strength to the wall assembly.
Best Practices for Framing With Stud Spacing in Mind
Follow these best practices to achieve reliable results. First choose your stud spacing before you begin framing and stick to that plan across the entire project. Consistency makes finishing work such as installing drywall and millwork much easier. Second use a layout chalk line to mark stud locations on the top plate and bottom plate and transfer these marks to the floor. This reduces layout errors and keeps studs straight and plumb during assembly.
Third add blocking between studs where fixtures will be attached. Blocking provides a strong surface for securing cabinets handrails and heavy shelving. Fourth consider insulation and electrical needs early. Optimum stud spacing should allow standard insulation batts to fit snugly without excessive cutting which reduces thermal performance. Fifth when in doubt consult a structural engineer especially for long unsupported spans tall walls or walls that will support heavy loads.
Material Choices and Their Impact on Stud Spacing
Wood is the most common material for studs but metal studs are widely used in commercial construction and some residential applications. Metal studs come in specified gauges and are designed to meet performance standards at given spacing intervals. Always follow manufacturer recommendations for spacing when using metal studs.
Engineered wood products such as laminated studs can allow for wider spacing while maintaining strength which can reduce material costs and speed installation. However these choices should be validated by design documents or an expert and must comply with code requirements for the project.
Tools and Techniques for Accurate Layout
Investing in a few key tools makes stud spacing easier and more accurate. A reliable tape measure a speed square and a chalk line are essentials. A stud finder is useful for renovation work. For larger jobs consider a laser line tool which projects a perfectly straight reference line along the top plate to ensure stud alignment. Use a framing hammer an air nailer or construction screws depending on your fastening preferences and the material being joined.
Common Mistakes to Avoid
Avoid common pitfalls such as failing to plan for openings ignoring code requirements and not accounting for additional framing at corners and intersections. Another frequent mistake is mixing spacing patterns within the same wall which creates irregular backing for finishes. Inaccurate layout can force you to cut studs to fit which weakens the frame and creates wasted material. Finally overlooking the impact of insulation and mechanical systems on stud placement leads to conflicts during installation and delays.
Conclusion and Where to Learn More
Stud spacing is a small phrase with a big impact on the performance of a wall assembly. Proper planning consistent layout and attention to code and material specifics help ensure that walls are strong durable and ready to accept finishes and fixtures. For hands on guides installation tips and product recommendations visit fixolix.com where you will find resources that cover a wide range of repair and building topics. If you are looking for additional inspiration and finished project ideas consider exploring curated content at Romantichs.com.
Use this guide as a starting point and always verify local code requirements and manufacturer instructions for the best results. With careful layout and attention to detail your stud spacing will support safe and lasting construction.