

Door Alignment: Complete Guide to Fix, Adjust and Maintain
What is Door Alignment
Door alignment refers to the precise positioning of a door within its frame so that it opens and closes smoothly, seals evenly and hangs true without rubbing or binding. Proper Door Alignment improves function, reduces wear on hardware and prevents drafts and security gaps. Whether you work on interior doors or exterior entries, mastering basic alignment techniques saves time and money and keeps a home safe and comfortable.
Why Door Alignment Matters
A misaligned door can create a chain of problems. Poor alignment can cause sticky latching, uneven gaps that let air leak, increased energy bills and premature wear on hinges and locks. Misalignment may also reduce security by preventing the bolt from fully engaging. For landlords and property managers, routine checks for Door Alignment reduce repair calls and preserve property value. Simple corrections often avoid the need for complete door replacement.
Common Causes of Misaligned Doors
Understanding the root cause helps you choose the right fix. Common causes include:
- Settling or shifting of the building structure over time
- Loose or worn hinge screws
- Swelling or shrinking of the door due to moisture or temperature changes
- Loose strike plate or latch mechanism
- Improper installation from the start
Essential Tools for Door Alignment
Before you begin, gather basic tools. You will likely need a screwdriver, a cordless drill with driver bits, shims made of wood or composite, a hammer, wood filler, a chisel, a utility knife and fine grit sandpaper. A level and a tape measure help confirm vertical and horizontal alignment. Quality tools make corrections faster and more precise and reduce the chance of causing further damage.
Step by Step Door Alignment Guide
Follow this step by step process to diagnose and correct common alignment issues. Work carefully and test the door often as you make adjustments.
Step 1 Inspect and Diagnose
Start by opening and closing the door slowly. Look for points where the door rubs the frame. Check gaps along the top and sides. Use a flashlight to inspect the strike plate area when the door is closed. Mark problem areas with a pencil. Check hinge screws and the strike plate screws for looseness. Often a loose hinge screw is the only cause.
Step 2 Tighten and Replace Fasteners
If screws are loose, tighten them first. For stripped screw holes, replace short screws with longer screws that reach the framing behind the jamb for a stronger hold. Do not overtighten or you may strip the wood further. If a hinge is bent or cracked replace the hinge. After tightening, test the door. Many doors that seemed misaligned are fixed by securing worn fasteners.
Step 3 Adjust the Hinges
Adjusting hinge position can raise, lower or shift the door laterally. For slight adjustments, remove the hinge screws on the jamb side and insert thin shims behind the hinge leaf to move the hinge out slightly. For a lower door use a thinner shim near the top hinge. If the door needs to be raised, move the shim location or add material under the lower hinge. Always reinstall screws and test the operation. Make incremental changes so you avoid over correcting.
Step 4 Plane or Sand the Door
If the door edge rubs the jamb even after hinge adjustments, you can remove small amounts of wood from the edge. Remove the door from its hinges and use a plane or sanding block to remove material where the door rubs. Work slowly and check frequently by rehanging the door. If you need to remove more than a few millimeters consider other causes like swollen wood from moisture that should be addressed first.
Step 5 Adjust the Strike Plate
When the latch does not meet the strike plate properly you may need to reposition the plate. Unscrew the strike plate and move it slightly up or down to align with the latch bolt. If the screw holes are enlarged use wood filler and let it dry before installing the plate in a new position. For a deeper latch engagement you can chisel a slightly larger pocket for the strike plate. Test the latch repeatedly to ensure smooth catching.
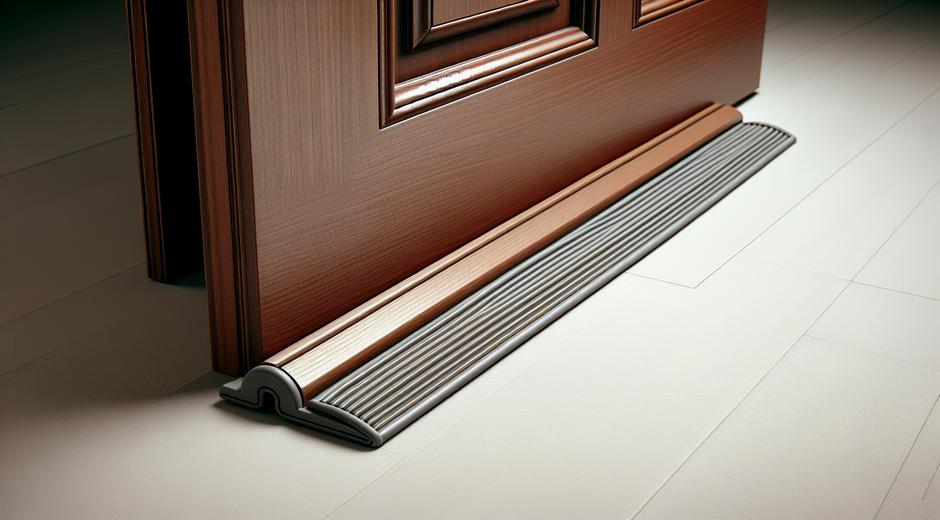
Step 6 Weatherstrips and Thresholds
Sometimes what looks like misalignment is the result of worn weatherstripping or a settled threshold. Replace compressed weatherstrips to restore even sealing. If the threshold is low or warped replace or adjust it so the bottom of the door has a uniform gap. Proper insulation contributes to performance and comfort as much as mechanical alignment.
When to Call a Professional
Many Door Alignment problems are DIY friendly, but certain signs mean you should consult a professional carpenter or door technician. Call for professional help if you detect extensive structural settling, severe warping of the door or frame, damaged jambs or if the door supports security hardware such as multipoint locks that require precise factory setting. Professionals can also handle metal doors and fire rated doors that have strict code requirements.
Maintenance Tips to Keep Doors Aligned
Routine maintenance reduces the chance of misalignment returning. Key tasks include:
- Seasonal inspection of hinge and strike plate screws
- Lubrication of hinges and latch mechanisms with a silicone based lubricant
- Monitoring moisture near exterior doors and repairing leaks promptly
- Replacing worn weatherstrips and threshold seals
- Testing latch engagement every few months and making small adjustments as needed
Energy and Safety Benefits
Proper Door Alignment increases thermal comfort by eliminating drafts and helps doors close fully which improves insulation and reduces energy costs. Security improves when the latch and bolt fully engage with the strike plate. Balanced doors are also safer around children and pets since they close smoothly and predictably.
Common Mistakes to Avoid
Avoid heavy handed fixes that create new problems. Do not force a door closed with a closed latch. Do not overplane a door in a single pass. Avoid using short screws in hinge screw holes that will strip easily. If you replace screws use stainless steel or coated screws for exterior doors to prevent rust. If you are unsure about local code rules for fire rated doors consult a professional.
Resources and Further Reading
If you want clear guides and quick tips for other home repair tasks visit fixolix.com where you will find practical articles on hardware repair, carpentry fundamentals and preventative maintenance. For those inspecting doors in vacation properties and rental spaces you may find travel related property management tips helpful at TripBeyondTravel.com which often covers checklists for hosts and renters.
Conclusion
Door Alignment is an essential skill that improves comfort, safety and the longevity of doors and hardware. With a few tools, careful observation and basic techniques you can correct most alignment issues quickly. Keep a small maintenance routine to avoid repeat problems and call a professional for complex structural or safety critical situations. Proper alignment pays off in better performance and fewer emergency repairs.