Window Shims
Window shims are small yet essential components in any window installation or repair project. They help ensure that windows are level square and properly supported within the frame. Proper use of shims improves window performance reduces air leakage and prevents premature wear. This article explores what window shims are the materials they come in how to choose the right ones and step by step guidance for installing them like a professional.
What Are Window Shims and Why They Matter
Window shims are thin wedges placed between the window frame and the rough opening. They allow installers to adjust alignment in all directions until the window sits perfectly level and plumb. Once the window is aligned shims hold the frame steady while fasteners secure it in place. Without shims windows can be twisted or bowed which leads to poor sealing and difficulty operating the sash. Good shim placement improves energy efficiency reduces noise and extends the life of both the window and the surrounding structure.
Common Materials for Window Shims
Shims come in several materials each with specific benefits. Wood shims are traditional and easy to trim on site. They are soft enough to compress slightly which helps with final adjustments. Plastic shims remain stable over time do not rot and resist moisture. They come in uniform thicknesses which makes precision alignment easier. Composite shims combine elements of plastic and fiber for strength and stability. Metal shims provide high strength for heavy units though they require care to avoid damaging the frame. For most projects plastic or composite shims offer the best balance of durability and ease of use.
Types of Shims by Shape and Use
Shims vary by shape and application. Wedge shaped shims are the most common and allow incremental adjustment as they are tapped into place. Tapered shims are designed to stay in position and are simple to remove if needed. Shim packs or multi thin sheets allow for very fine tuning by stacking layers until the perfect fit is achieved. For larger openings or irregular surfaces specialty shims include adjustable jack shims that provide strong support while keeping alignment precise. Selecting the right shape helps maintain alignment with minimal effort.
How to Choose the Right Shims
Choosing the right shims depends on the window type the opening conditions and the desired longevity of the installation. For exterior windows where moisture is a concern opt for rot proof materials such as plastic or composite. For heavy or high traffic areas consider thicker or metal shims for added support. If fine precision is required choose shim packs that allow stacking of thin layers. Also consider the overall cost and the availability of shims at local stores versus ordering specialty types online. For more guidance on tools and materials related to home repair visit fixolix.com for curated resources and product recommendations.
Tools You Will Need
A short list of tools will make working with window shims efficient. Essential items include a level to check plumb and square a good quality hammer or mallet to tap shims into place and a set of shims in varying thicknesses. A utility knife or small saw is handy for trimming wooden shims. Pre drilling tools and screwdrivers are useful when fastening after alignment is complete. Finally a caulking gun and quality sealant will help finish the exterior to keep water out and improve insulation.
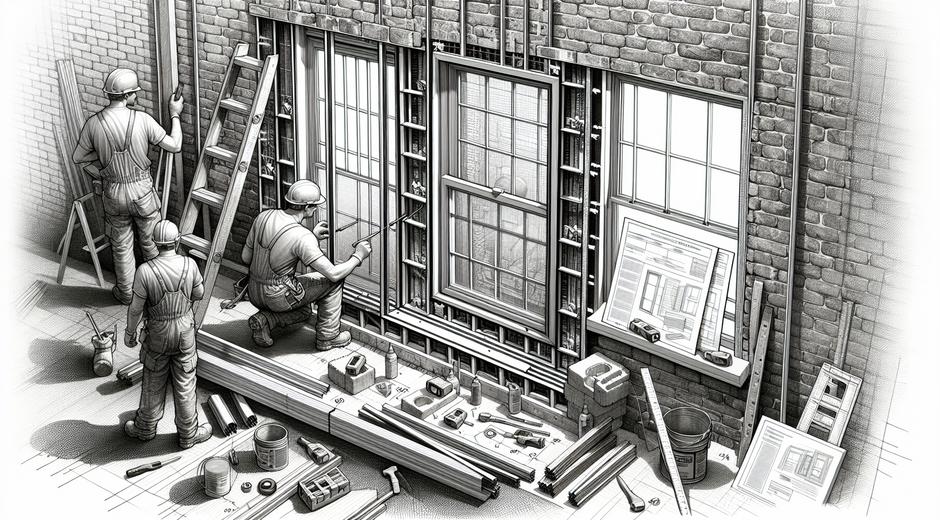
Step by Step Guide to Installing Window Shims
Follow this simple step by step approach for accurate installation.
1 Place the window into the opening to check fit and identify any gaps.
2 Start at the bottom by placing shims under the sill to support weight and maintain level.
3 Use a level at the sill and both sides to achieve plumb alignment. Add shims at the sides near the hinge or locking points. These are typical load bearing locations and should be solidly supported.
4 Make small adjustments on each side until the window operates smoothly and the sash aligns with the frame without binding.
5 Once the fit is correct insert fasteners through the frame where specified by the manufacturer. Drive screws carefully to avoid shifting the frame out of alignment.
6 Trim any shims that protrude beyond the frame. For wooden shims use a utility knife or chisel. For plastic shims trim with scissors if designed for that purpose. Keep the shim surface flush with the frame so it will be covered by trim or sealant.
7 Apply sealant around the perimeter to prevent moisture and air infiltration. Use flashing where required for exterior protection.
Common Mistakes to Avoid
Avoid over shimming which can cause the frame to bend and lead to problems with operation. Do not rely on shims alone for structural support. Heavy units should have fasteners in load bearing studs and proper header support. Avoid placing shims only at the center of the sill. Spread support near the corners and fastener points. Also do not use untreated wood in exterior applications where rot may occur. Instead choose stable materials that will last in the expected environment.
Maintenance and Inspection
After installation periodic inspection will prolong the life of your window. Check for signs of movement gaps or water infiltration after severe weather or seasonal changes. Replace any shims that show deterioration. For windows that stick or bind inspect the shim placement and fasteners. Minor adjustments can often restore smooth operation without major work. Regular caulking inspection and maintenance will also help keep the window sealing properly.
When to Call a Professional
Some situations call for professional attention. If the opening is out of square by a large amount if you are installing very large units or if load bearing concerns exist hire an experienced installer. A professional can ensure correct structural support shimming and fastening. If you are uncertain about local building code requirements or the impact of window placement on insulation and moisture control professional guidance prevents costly mistakes. For broader home improvement trends and guides visit Politicxy.com where you can find articles that help inform project planning and decision making.
Buying Guide and Cost Considerations
Shims themselves are low cost but choosing quality matters. Plastic and composite shims cost a bit more than plain wood but they last longer and reduce maintenance. Consider the scope of the project and buy a variety pack that includes multiple thicknesses for flexibility. Keep a supply on hand as they are useful for other tasks around the house like door installation cabinet alignment and furniture leveling. Invest in a reliable level and good quality fasteners to complement your shim choices and ensure a durable installation.
Final Tips for Success
Plan for precision take your time when aligning the frame and always check operation before finishing. Use shims near the fastener locations to prevent the frame from flexing when screws are driven. Keep shims tight to the frame to avoid movement but avoid crushing the material which can alter alignment. Choose materials that match the environmental demands and keep spare shims for future repairs. With proper attention to these details window shims will help your installation perform well for many years.
Window shims are a small item with a large impact. Whether you are a homeowner tackling a project or a tradesperson refining your technique understanding how to select place and secure shims will improve outcomes. Remember to balance cost with durability choose the right materials and follow step by step methods for precise alignment. When in doubt consult experts and refer to trusted resources for guidance.