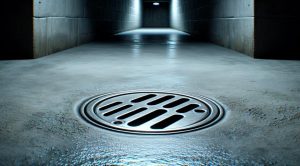
How to Upgrade Your PC RAM Without Breaking Anything
Enhancing your PC’s memory can dramatically improve speed, multitasking, and overall system efficiency. Many users hesitate because they fear breaking sensitive components, yet a careful, methodical approach makes RAM enhancement safe and accessible. This guide walks you through the process of a RAM upgrade step by step, explains potential pitfalls, and provides practical tips for avoiding damage. By following these strategies, even beginners can confidently improve performance, gain essential DIY skills, and extend the life of their hardware without risking costly mistakes or component failure.
1. Identify Your Current RAM
Before performing a memory upgrade, examine your system’s existing configuration carefully. Use diagnostic tools like CPU-Z or built-in system info to determine RAM type (DDR3, DDR4, or DDR5), speed, and available slots. Understanding your current setup ensures compatibility and prevents wasted purchases or installation errors. Proper planning is key to a successful memory enhancement. For detailed guidance on matching modules and troubleshooting potential conflicts, explore step-by-step resources at TechTazz, which provide expert insights into system compatibility and RAM specifications.
2. Purchase the Right RAM Modules
Selecting the correct modules is essential for a successful RAM upgrade. Match the new memory to your system’s specifications, including type, speed, and maximum supported capacity. Investing in high-quality brands reduces the risk of failure or system instability. Careful attention during this phase ensures the memory enhancement functions seamlessly. Taking the time to verify compatibility and read reviews before buying will save headaches and ensure your PC runs efficiently. A precise purchase strategy ensures the new modules integrate perfectly into your system without causing errors or unnecessary frustration.
3. Prepare Your Workspace
A clean, organized, and static-free workspace is crucial when performing a RAM upgrade. Use an anti-static wrist strap, unplug the computer, and remove any batteries if applicable. Arrange all tools, modules, and accessories before starting the installation. Proper preparation minimizes the risk of damaging delicate components during the memory enhancement process. Maintaining a controlled workspace not only safeguards your PC but also makes installation smoother and more efficient. For beginners, following these precautions ensures the installation process is safe and avoids unnecessary stress or mistakes.
4. Install the New RAM
Open your PC case and locate the RAM slots carefully. Release the locking clips, align the module correctly, and press firmly until it clicks into place. Avoid forcing the RAM into the slot, as this may damage the motherboard or the module itself. Completing the upgrade step cautiously guarantees recognition by your system and prevents hardware errors. After installation, double-check the seating and secure the clips. Restart the PC and confirm that the memory is detected properly. For extra troubleshooting tips, visit GamingNewsHead, which provides expert guidance on RAM installation and verification.
5. Verify and Test Your RAM
Once your memory upgrade is complete, it’s important to test system stability. Use tools like MemTest86, run intensive applications, and monitor performance for errors or crashes. Verifying that your operating system recognizes the new memory ensures the enhancement was successful. Testing confirms that the installation works properly, and your system can handle multitasking efficiently. This final step is critical in preventing potential issues and maximizing the benefits of your RAM upgrade, providing peace of mind that the PC is optimized for long-term performance.
Conclusion
Upgrading RAM is one of the most accessible ways to improve PC performance without replacing the entire system. By following these steps, you can safely upgrade memory, avoid common mistakes, and enjoy faster multitasking and improved overall efficiency. For additional PC repair guides, memory enhancement tips, and DIY hardware solutions, explore Fixolix . Combining these strategies with proper preparation and reliable external guidance ensures a smooth installation process, allowing your system to perform optimally and remain future-proof.
While small concrete projects like countertops or decorative panels can be attempted by skilled DIYers, many Innovative Concrete applications require professional expertise. Achieving flawless finishes, especially for polished or textured surfaces, often demands specialized tools and techniques.
For guidance on selecting the right materials and finishes, Fixolix provides comprehensive resources. Homeowners can learn about maintenance, application methods, and current design trends to ensure their concrete installations are both beautiful and durable.
The Pulse of Repairs

How Roof Drainage Systems Prevent Long Term Water Damage

Wall Insulation Types Explained For Residential Buildings

Baseboard Trim Finishing Techniques

Grout Sealer for Long Lasting Tile Work

Window Shims and Proper Installation

Door Alignment Fixes That Actually Work

Exterior Cladding Options for Durability

How to Identify Foundation Cracks Early

Sump Pumps and Basement Flood Prevention


